
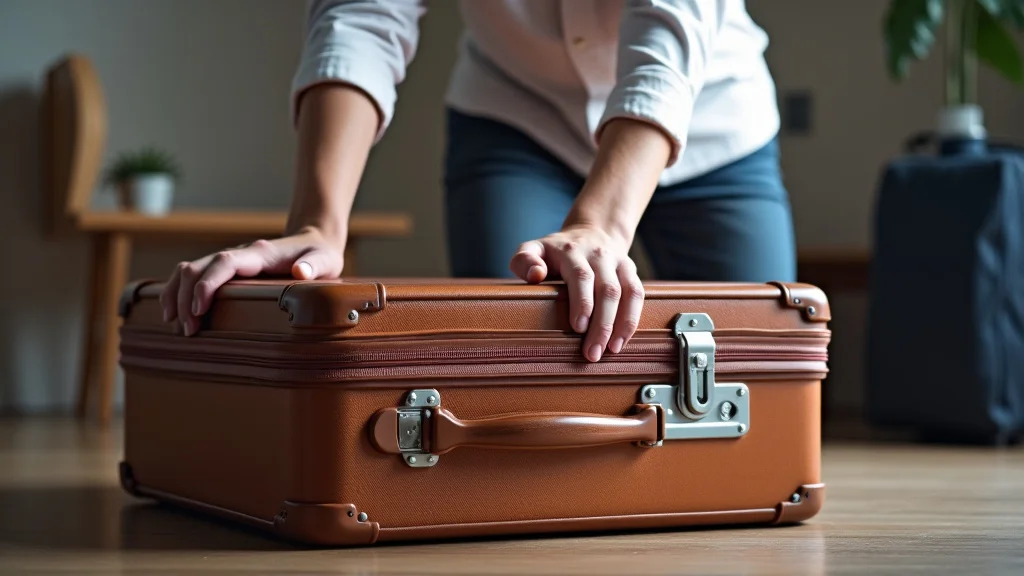
Picture this: you’re at the airport, ready for that dream vacation, but your suitcase wheel decides to stage a revolt. Or maybe the zipper gets jammed, threatening to unleash all your carefully packed belongings. Frustrating, right? Instead of tossing your trusty travel companion, what if you could give it a new lease on life? This post will guide you through the ins and outs of luggage repair, providing you with the knowledge and skills to mend your bags and save money. You’ll gain practical insights, learn how to troubleshoot common issues, and discover the joy of fixing things yourself. Get ready to explore the world of luggage repair and transform your travel experience.
Key Takeaways
- Learn to identify common luggage repair problems, such as broken wheels, zippers, and handles.
- Discover essential tools and materials needed for successful repairs.
- Gain step-by-step instructions for performing various repair tasks.
- Understand the difference between DIY repairs and professional services.
- Find resources for sourcing replacement parts.
- Learn how to maintain and extend the life of your luggage.
Common Luggage Problems and How to Fix Them
Suitcases and travel bags go through a lot. They’re tossed around by baggage handlers, dragged across rough surfaces, and stuffed with all sorts of items. This constant wear and tear eventually leads to problems, from minor annoyances to major malfunctions. Understanding the common issues and how to address them is the first step in successful luggage repair. You don’t need to be a skilled craftsperson to perform many of these fixes. Often, a bit of knowledge and the right tools are all you need to keep your luggage in top shape and ready for your next adventure. Many common problems, once diagnosed, are relatively simple and can be handled quickly. This section will walk you through the most prevalent issues and explain what you can do about them.
Wheel Replacement and Repair
Broken wheels are a frequent problem, and they can make your bag almost useless. Luckily, wheel replacement is often straightforward. There are various wheel types, including inline skate wheels, spinner wheels, and recessed wheels. Knowing the type you have is important to buying the right replacement. The process generally involves removing the old wheel, usually held in place by screws or rivets, and then installing the new one. You might need a screwdriver, pliers, or a small hammer and some rivets or bolts for the new wheel. Some bags have wheels that are easy to pop off, while others may require tools to remove the old ones. The process will vary slightly depending on the type of wheel your bag has, but the basic principle remains the same. Taking action is always better than letting the issue persist.
- Identifying the Wheel Type: Examine the wheel carefully. Is it a single wheel (inline) or a set of four (spinner)? Knowing the type is vital for finding a replacement.
- Removing the Old Wheel: Locate the screws or rivets securing the wheel. Use a screwdriver to remove the screws or a drill to remove the rivets.
- Installing the New Wheel: Align the new wheel with the mounting holes and secure it with screws or rivets. Use the existing hardware, if possible.
- Testing the Wheel: Make sure the wheel spins freely and the bag rolls smoothly. Give it a test roll to ensure the alignment is correct.
Zipper Issues and Solutions
Zippers are another common weak point. They can become stuck, come off track, or break altogether. A stuck zipper can often be freed with a bit of patience and some simple techniques. For a zipper off track, you might be able to gently coax it back on using pliers. Complete zipper failure, however, requires a bit more effort. Sometimes, the slider needs replacing, or the entire zipper may have to be removed and
- Lubricating the Zipper: Use a wax-based lubricant (like candle wax) or a zipper lubricant to help the slider move smoothly. Apply it along the zipper teeth.
- Re-aligning a Zipper: If the zipper has come off track, try to gently guide the slider back onto the teeth. Use pliers to help pinch it.
- Replacing a Zipper Slider: If the slider is damaged, you can often buy a replacement. Carefully remove the old slider and insert the new one.
- Replacing the Zipper Tape: Consider replacing the entire zipper if the teeth are broken. This is a more involved repair, requiring a needle and thread.
Handle Repair and Replacement
The handles on your suitcase take a lot of punishment, especially those extendable ones. Whether the handle is a top handle, side handle, or a telescoping handle, damage is almost inevitable. Broken handles can make carrying your bag difficult and inconvenient. Fortunately, many handle problems are repairable. This involves anything from tightening screws to replacing a broken handle. Replacing a telescoping handle can be tricky and may require ordering a specific replacement part. You can sometimes find replacements at luggage stores or online. Carefully remove the damaged handle and install the new one. Always prioritize safety. Many modern bags are made of durable materials that should be able to last a long time if properly cared for.
- Tightening Loose Screws: Often, loose screws are the reason for handle problems. Check all screws regularly and tighten them.
- Replacing a Top Handle: Top handles are frequently bolted on. Remove the bolts and install a replacement.
- Replacing a Telescoping Handle: This is more complex and may involve removing the entire handle assembly. This may require rivets, and sometimes, specialized tools.
- Reinforcing Weak Points: If the handle is attached to a weak area, you can reinforce it with patches or extra stitching.
Essential Tools and Materials for Luggage Repair
Having the right tools and materials makes luggage repair much easier and more successful. While you won’t need a full workshop, a basic toolkit will cover most common repairs. This section will list essential items and explain their uses. Remember, investing in quality tools can save you money and frustration in the long run. There’s a certain satisfaction that comes from being prepared and fixing things yourself. A well-stocked kit is a worthwhile investment for any traveler who wants to keep their luggage in good shape. There are many kits available online that cover the basics of what is needed.
Basic Toolkit
A basic toolkit should include items that cover a wide range of tasks. You’ll need tools for removing and installing screws, cutting materials, and measuring. Quality is important, but you don’t need the most expensive tools to start. A few simple items will often do the trick. You can always add to your kit as you gain experience and encounter more complex repairs. A good toolkit helps you handle a variety of situations. Always ensure the tools are stored safely when not in use. Basic maintenance is very important for the tools themselves.
- Screwdrivers: A set of screwdrivers (Phillips and flathead) in various sizes is essential.
- Pliers: Include needle-nose pliers and regular pliers for gripping and bending.
- Utility Knife: Useful for cutting fabrics, straps, and other materials.
- Measuring Tape: To measure parts and determine the size of replacement components.
- Seam Ripper: Helpful for removing stitches when replacing zippers or other components.
- Hammer: A small hammer can be used to insert rivets or lightly tap parts into place.
Specialized Tools and Materials
As you tackle more complex repairs, you’ll need some specialized tools and materials. These items are specific to certain tasks, such as replacing wheels or repairing fabric tears. Don’t be discouraged if you don’t have all these items initially. You can always acquire them as needed. The investment can save you money in the long run. Special tools often allow for more effective solutions. As your skills grow, so will your toolkit. The use of specialized tools will make your repairs more precise and professional.
- Riveter: Needed for installing rivets, often used in wheel and handle replacements.
- Sewing Machine (Optional): Useful for repairing tears in fabric or attaching straps.
- Leather/Fabric Glue: For gluing patches or repairing fabric tears.
- Replacement Wheels: Ensure you have the right type and size for your luggage.
- Replacement Zippers and Sliders: Keep these on hand for zipper repairs.
- Strong Thread and Needles: For hand-stitching or use with a sewing machine.
Step-by-Step Guides for Common Repairs
Now, let’s explore some step-by-step guides for common luggage repair tasks. These guides will provide practical instructions for addressing the issues discussed earlier. Following these steps carefully will increase your chances of a successful repair. Remember to work in a well-lit area and take your time. There is no need to rush the repair process. The better the work is, the more likely the bag will last. Remember to prioritize safety. Be careful when using tools like knives or scissors. Before you start, gather all the required tools and materials.
Wheel Replacement Procedure
Replacing a wheel is often easier than it seems. The basic procedure involves removing the old wheel, installing the new one, and securing it. The specifics may vary depending on the wheel and the luggage design. However, the general steps remain consistent. Proper alignment is very important for ensuring the bag rolls smoothly. Careful attention to detail will ensure the wheel is properly fitted. Taking your time here will help make the bag roll much easier.
- Identify the Wheel Type: Is it a single inline skate wheel or a spinner wheel?
- Gather Tools and Materials: Screwdriver, replacement wheel, screws/rivets.
- Remove the Old Wheel: Unscrew or drill out the rivets securing the wheel.
- Position the New Wheel: Align the new wheel with the mounting holes.
- Secure the New Wheel: Screw in the new wheel or install rivets.
- Test the Wheel: Make sure the wheel spins freely and the bag rolls smoothly.
Zipper Slider Replacement Instructions
If the zipper slider is damaged, you can often
- Gather Tools and Materials: Pliers, replacement slider, utility knife or seam ripper.
- Locate the Slider: Identify the broken slider and carefully cut it away or remove it with a seam ripper.
- Prepare the Zipper Teeth: Make sure the zipper teeth are clean and undamaged.
- Insert the New Slider: Carefully slide the new slider onto the zipper teeth.
- Test the Zipper: Zip and unzip the zipper to ensure the slider is working correctly.
Telescoping Handle Repair
Telescoping handles can be complex, but many problems can be fixed. Common issues involve loose screws, broken handle segments, or issues with the handle’s locking mechanism. Some repairs are relatively simple, such as tightening loose screws. More significant damage, like a broken segment, may require part replacement. Always disconnect the bag’s handle from any power source before starting any electrical repairs. Follow any guidelines in the bag’s user manual. It’s often helpful to keep the original broken handle as a reference when acquiring replacement parts.
- Inspect the Handle: Identify the specific problem (loose screws, broken segment, etc.).
- Tighten Loose Screws: Use a screwdriver to tighten any loose screws.
- Replace Broken Handle Segments: Obtain a replacement segment and carefully install it. This may require some disassembly.
- Repair the Locking Mechanism: Address any issues with the handle’s locking system, which could include oiling it.
- Test the Handle: Extend and retract the handle to make sure it functions correctly.
When to Consider Professional Luggage Repair Services
While many luggage repair tasks are suitable for DIY, there are times when it’s best to seek professional help. Complex repairs, such as structural damage or issues with electronics, are typically best left to the experts. Attempting these repairs without experience can worsen the problem. Professional services often have specialized tools and expertise. They can also source original parts, ensuring a quality repair. Knowing when to call in the professionals saves you time and possible money. The decision should be based on your skill level and the severity of the damage. Here are key scenarios when professional help is best.
Complex or Extensive Damage
If your luggage has suffered significant damage, such as a crushed frame or extensive tears, it’s usually best to take it to a professional. These repairs may require specialized equipment and expertise. Professionals have the skills to handle these complex issues. They can also evaluate the overall structural integrity of your bag. They can help in instances that involve structural integrity issues. Attempting these repairs yourself could be risky and might not yield good results. Professional repair is often the most cost-effective solution.
Electrical or Electronic Issues
Modern luggage often has electrical or electronic components, such as USB chargers or built-in scales. If these components malfunction, it’s best to consult a professional. Electrical repairs can be risky if you’re not experienced. Professionals have the knowledge to safely diagnose and fix these issues. Tampering with these systems could potentially damage your bag. These specialists will make sure everything is in top working order. They also have access to the correct parts. It’s often not worth the risk.
When You Lack the Time or Skills
Sometimes, even if you could perform a repair, you may not have the time or the right skills. If you’re pressed for time or uncomfortable with the repair process, professional services are a good option. Professionals can complete repairs quickly and efficiently. You can focus on other important matters. They provide peace of mind, knowing the repair will be done correctly. Professional repair can be a good value if you want a quick, reliable solution. It is certainly an option.
Maintaining and Extending the Life of Your Luggage
Preventative maintenance is the key to extending the life of your luggage and avoiding costly repairs. Simple actions can go a long way in ensuring your bags remain in excellent condition. Proper storage and cleaning are also important. This section will give you helpful tips for prolonging the life of your luggage. Taking these steps is often time well-spent. Protecting your investment in the bag makes sense. It’s often the best approach. Good habits will keep your luggage in great shape for many years.
Regular Cleaning and Inspection
Regular cleaning is important to keep your luggage in great shape. Clean the exterior of your bags after each trip to remove dirt and grime. Check for any signs of damage, such as tears, loose threads, or loose screws. Address any issues as soon as possible. Minor problems, if they are addressed quickly, can be fixed before they escalate. A few minutes of your time can often prevent a larger problem. Cleaning and inspection are easy ways to prolong the life of your bags. It’s an easy win.
- Wipe down the exterior: After each trip, wipe down the exterior of your luggage with a damp cloth to remove dirt and grime.
- Check for damage: Inspect your bags for any signs of damage, such as tears, loose threads, or loose screws.
- Address issues promptly: Fix any issues as soon as they arise to prevent them from worsening.
- Clean wheels and zippers: Clean the wheels and zippers to remove any debris and ensure smooth operation.
Proper Storage Practices
How you store your luggage also impacts its lifespan. Store your bags in a cool, dry place. Avoid storing them in direct sunlight. Sunlight can degrade the materials. Fill your bags with packing materials to help maintain their shape when storing. Consider using luggage covers for additional protection. Proper storage helps to prevent damage and keeps your luggage in good condition. You can get many years of service from your bags if they are properly stored. Storage should be considered as a long-term investment in your travel items.
- Store in a cool, dry place: Avoid storing luggage in damp or humid areas.
- Avoid direct sunlight: Store your bags away from direct sunlight, which can cause fading and material degradation.
- Use packing materials: Stuff your bags with packing materials to help maintain their shape.
- Use luggage covers: Consider using luggage covers for added protection against dust and scratches.
Using Your Luggage Correctly
How you use your luggage also affects its lifespan. Don’t overpack your bags. Overpacking puts excessive strain on zippers, handles, and seams. Distribute the weight evenly to reduce strain on the wheels and frame. Handle your bags carefully. Avoiding dropping them or throwing them around will reduce damage. Following these steps will extend the life of your luggage. They can reduce the likelihood of costly repairs. Proper usage is the easiest part of maintenance. The reward is a long life for your bags.
- Avoid overpacking: Don’t stuff your bags too full.
- Distribute weight evenly: Distribute the weight of your belongings evenly throughout the bag.
- Handle with care: Avoid dropping or throwing your luggage.
- Use appropriate luggage: Make sure you are using the correct size bag for the trip.
According to a 2023 study by Statista, the global luggage market is projected to reach $31.9 billion in 2027. This growth indicates a continued demand for travel bags, making the ability to repair them even more valuable. Proper maintenance and repair are key to protecting this investment.
| Factor | Impact on Luggage |
|---|---|
| Overpacking | Strain on zippers, handles, seams |
| Uneven Weight Distribution | Strain on wheels and frame |
| Rough Handling | Increased likelihood of damage |
| Poor Storage | Material degradation and damage |
Common Myths Debunked
Myth 1: You need to be a skilled craftsperson to repair luggage.
Reality: Many luggage repair tasks are simple and don’t require advanced skills. With basic tools, a bit of patience, and the right instructions, you can handle various repairs. Even if you’re not an expert, you can still address many common issues. There’s satisfaction and money to be saved from fixing your bags. The skills you need are often minimal, especially with the help of online resources.
Myth 2: It’s always cheaper to buy new luggage than to repair it.
Reality: Repairing your luggage is often more cost-effective than buying a new bag. The cost of a replacement wheel or zipper is usually much lower than the price of a brand-new suitcase. Repairing also helps you avoid the cost of replacing your whole bag. Repairs are often better for the environment. You also have the satisfaction of restoring something and keeping it out of the waste stream.
Myth 3: All luggage repair services are expensive.
Reality: The cost of luggage repair services varies widely. The cost depends on the type of repair and the location. Some services offer reasonable prices, especially for minor repairs. Prices often depend on the specific problem. It’s wise to shop around. A little research will often reveal cost-effective solutions. Getting quotes can save you money.
Myth 4: If a wheel breaks, the bag is useless.
Reality: A broken wheel doesn’t mean your bag is beyond repair. Wheel replacement is a very common fix. Many broken wheels can be replaced quickly and affordably. There’s often no need to replace the entire bag. Replacement wheels are often very easy to find. It’s often the simplest of fixes.
Myth 5: You need special equipment to replace a zipper.
Reality: Replacing a zipper slider can often be done with just pliers. Complete zipper replacement may need a seam ripper and needle and thread. However, it’s not always necessary to have specialized tools. The process may be more involved, but it is still doable. Hand-sewing zippers is a viable approach. There are usually ways to improvise, if necessary.
Frequently Asked Questions
Question: Where can I find replacement parts for my luggage?
Answer: You can find replacement parts at luggage stores, online retailers (like Amazon), or directly from the luggage manufacturer.
Question: How do I know if I can repair my bag myself?
Answer: Assess the damage. If the issue is minor (e.g., loose screws, a stuck zipper), you can likely repair it yourself. For more complex problems (e.g., structural damage), consider professional help.
Question: What’s the best way to clean my luggage?
Answer: Use a damp cloth to wipe down the exterior. For tougher stains, use a mild soap and water solution. Always test in an inconspicuous area first.
Question: Can I use superglue for luggage repair?
Answer: Superglue can be used for some minor repairs, such as fixing small tears or loose trim. However, it’s not ideal for all repairs. Consider specialized glues for fabrics or leather for more effective results.
Question: How can I prevent zipper problems?
Answer: Lubricate zippers regularly with a wax-based lubricant or zipper lubricant. Avoid overpacking your bags and ensure the slider is aligned correctly.
Final Thoughts
Mastering the art of luggage repair is a valuable skill for any traveler. From wheel


Leave a Reply